Radiant Mobile Makes Editing Photos on iPhone Crazy Fast With AI, Batch Edits and External Drive Support
Radiant Mobile Makes Editing Photos on iPhone Crazy Fast With AI, Batch Edits and External Drive Support
Wayne Grayson • Nov 08, 2023
The act of “editing” photos has never been more ubiquitous than it is today. What used to require a deep understanding of photography and specialized editing software is now done every second of every day and faster than the blink of an eye. Thanks to computational photography and advanced RAW processing on modern cameras, our photos are often “edited” as we take them. Our phones adjust colors, highlights, and shadows by combining multiple exposures, while our cameras apply basic edits to these parameters automatically after the shutter button is pressed.
And beyond the camera itself we have countless mobile and desktop apps for dialing in the perfect photo. With the rise of machine learning and artificial intelligence, each of these apps is becoming more and more powerful, allowing you to make one-tap edits to a photo that would have taken up to an hour 10 years ago and with desktop software. Despite all of this, a very discernible difference remains between the photos most of us take on our phones and those shot by professionals on powerful and expensive cameras. Even with machine learning on your side, a good eye and sense for color are hard to compete with.
At least, that was my opinion before I tried Radiant Photo Mobile, a new app for iPhone and Android from Radiant Imaging Labs.
A head start to powerful edits
The new Radiant Photo Mobile launches today and I’ve had the pleasure of testing a beta version of the iOS app for the past few weeks on my iPhone 15 Pro Max. In short, this app not only makes basic manual tweaks to things like exposure, highlights, and color fast and easy, it uses on-device AI to bring stunning, film-like quality to photos captured with your phone. And thanks to its support for external drives, SD cards, and CFexpress cards, you can also make edits to photos you’ve taken with a “real” camera with jaw-dropping results.
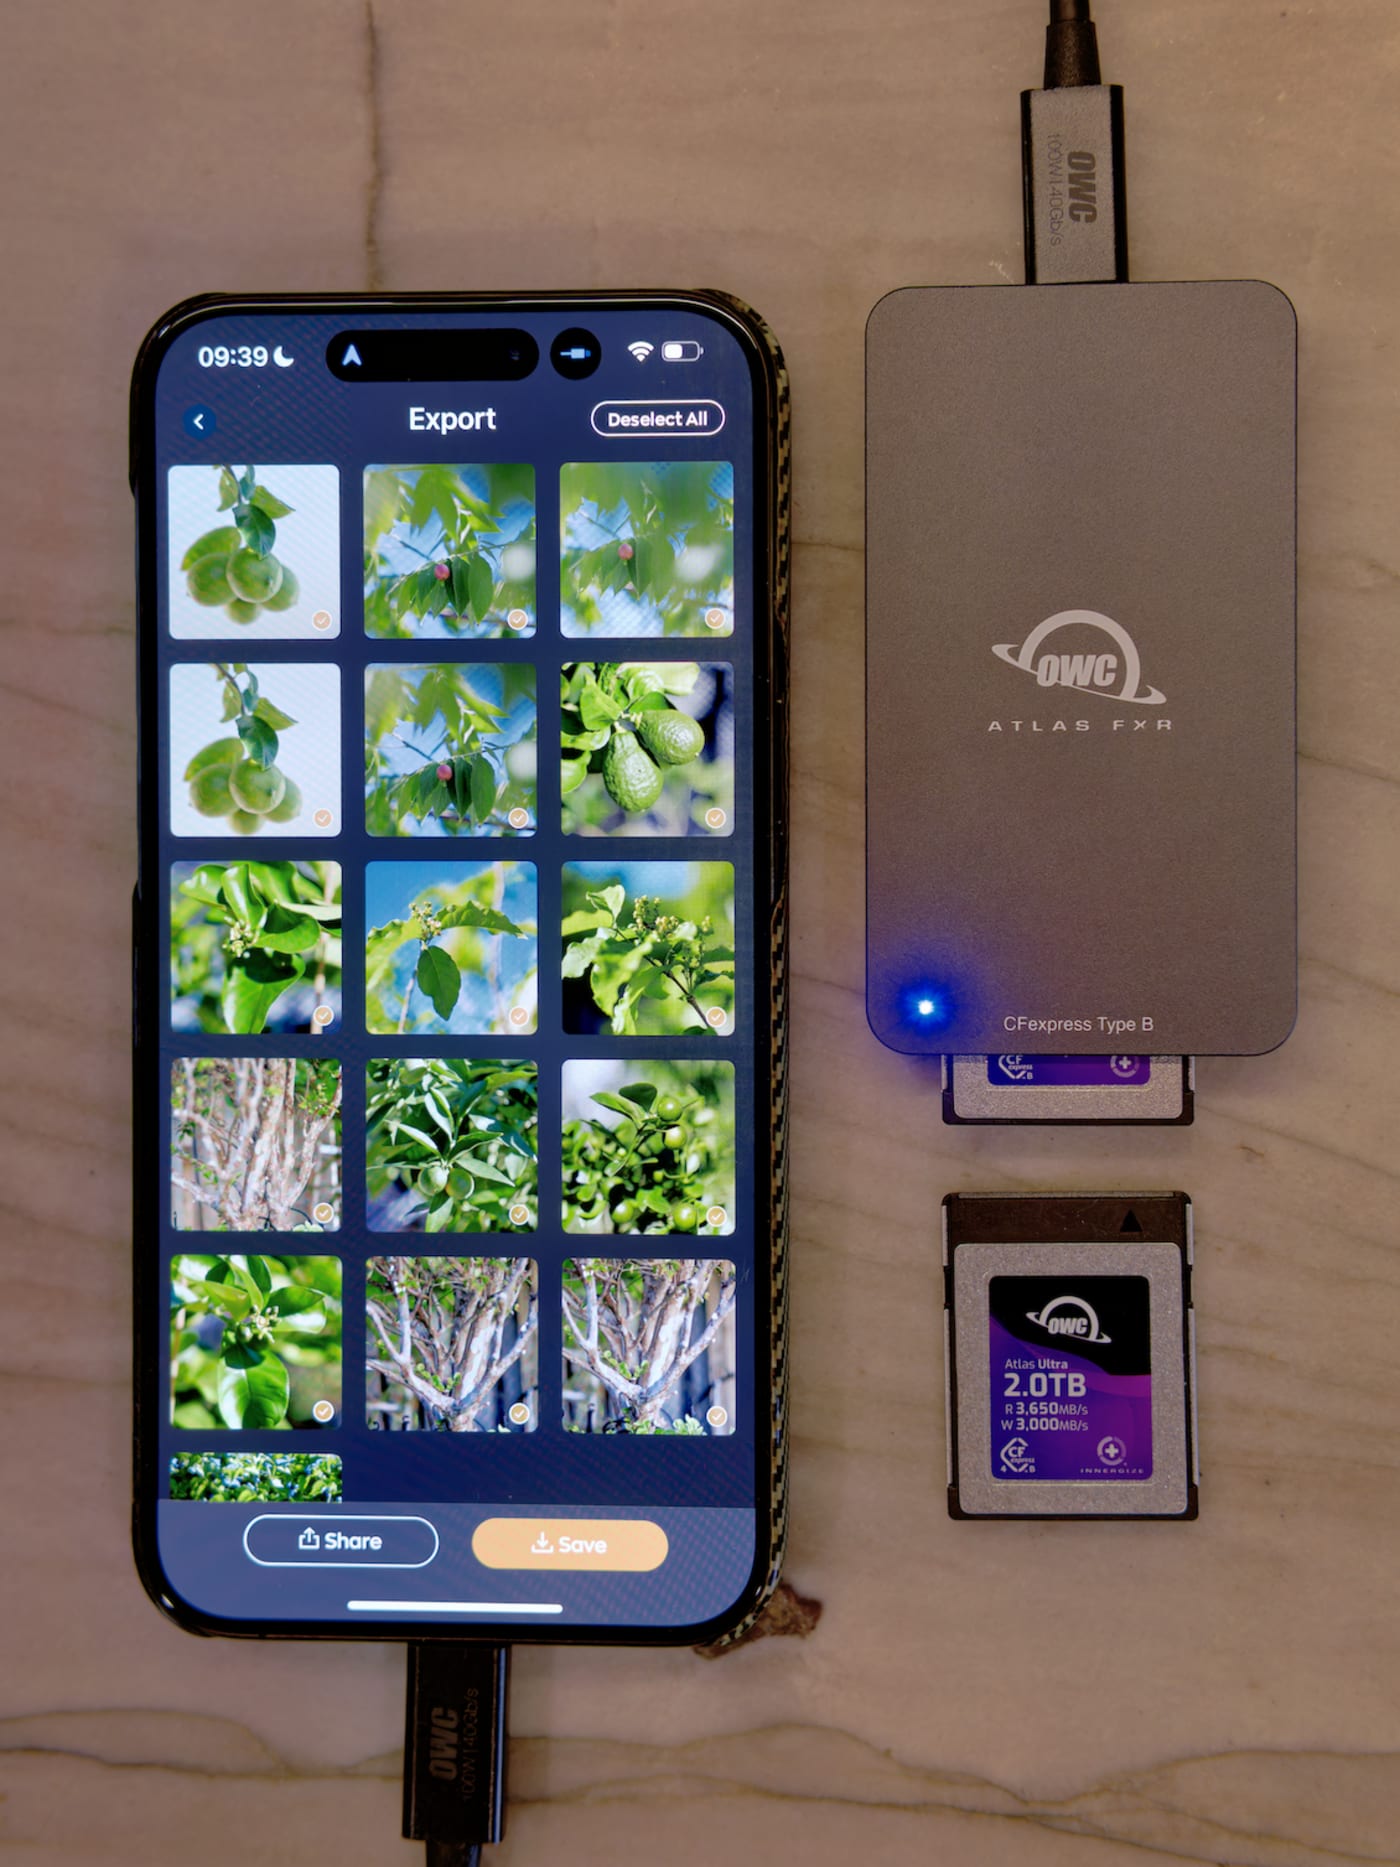
Plus, it has batch editing, allowing you to grab a group of photos and sync all or just some adjustments with a couple of taps. The result is an app that gives you complete control over the look of your photos while saving you time by giving you a head start in achieving those results through its AI auto enhancements.
Radiant Imaging Labs—which celebrated its first anniversary in September—recorded a webinar for the launch discussing the features of the app and demonstrating workflows. Check it out here.
Radiant also makes a desktop app and editing plugin called Radiant Photo. That app has been universally praised by reviewers like Shotkit, Fstoppers, and Digital Photo Magazine, which called the results you can achieve with Radiant, “astonishing.”
Elia Locardi is the CEO and Co-Founder of Radiant Imaging Labs. Locardi has been working as a professional travel photographer full-time since 2009. With the advance in quality, resolution, and sensor size in smartphones, Locardi says “mobile photography has become a main staple in my arsenal of cameras in recent years.”
With Radiant Photo Mobile, Radiant has taken all of the power, speed, and exclusive AI Auto enhancements that makes Radiant Photo such a powerful desktop app and they’ve brought it to your phone. Whether you’re shooting ProRAW photos with iPhone or you want to get a head start with some quick edits on RAW files from your camera, you can do it all with Radiant Photo Mobile.
“Now, combining Radiant Photo Mobile with the iPhone’s full-speed USB-C and ultra-fast cards and drives like those made by OWC, my mobile device has become a full-scale mobile production powerhouse,” Locardi says.
External drive support
The first thing you see when you open up Radiant Photo Mobile is the gallery screen. This presents you with a grid of all your on-device photos and videos, with options to sort just photos, or just videos. But thanks to Radiant Photo Mobile’s support for external drives, you can also plug in your drive to your phone, tap the file icon in Radiant and browse the Files app. With a few taps, you can quickly begin editing photos from a drive, SD Card, or CFexpress card.
I say quickly because you don’t have to import your files into the app or to upload your files to a cloud service. Radiant Photo Mobile can see and grab your files if they are on iCloud they are on your phone or external drive, but there’s no need to hand them over in any way to get started editing.
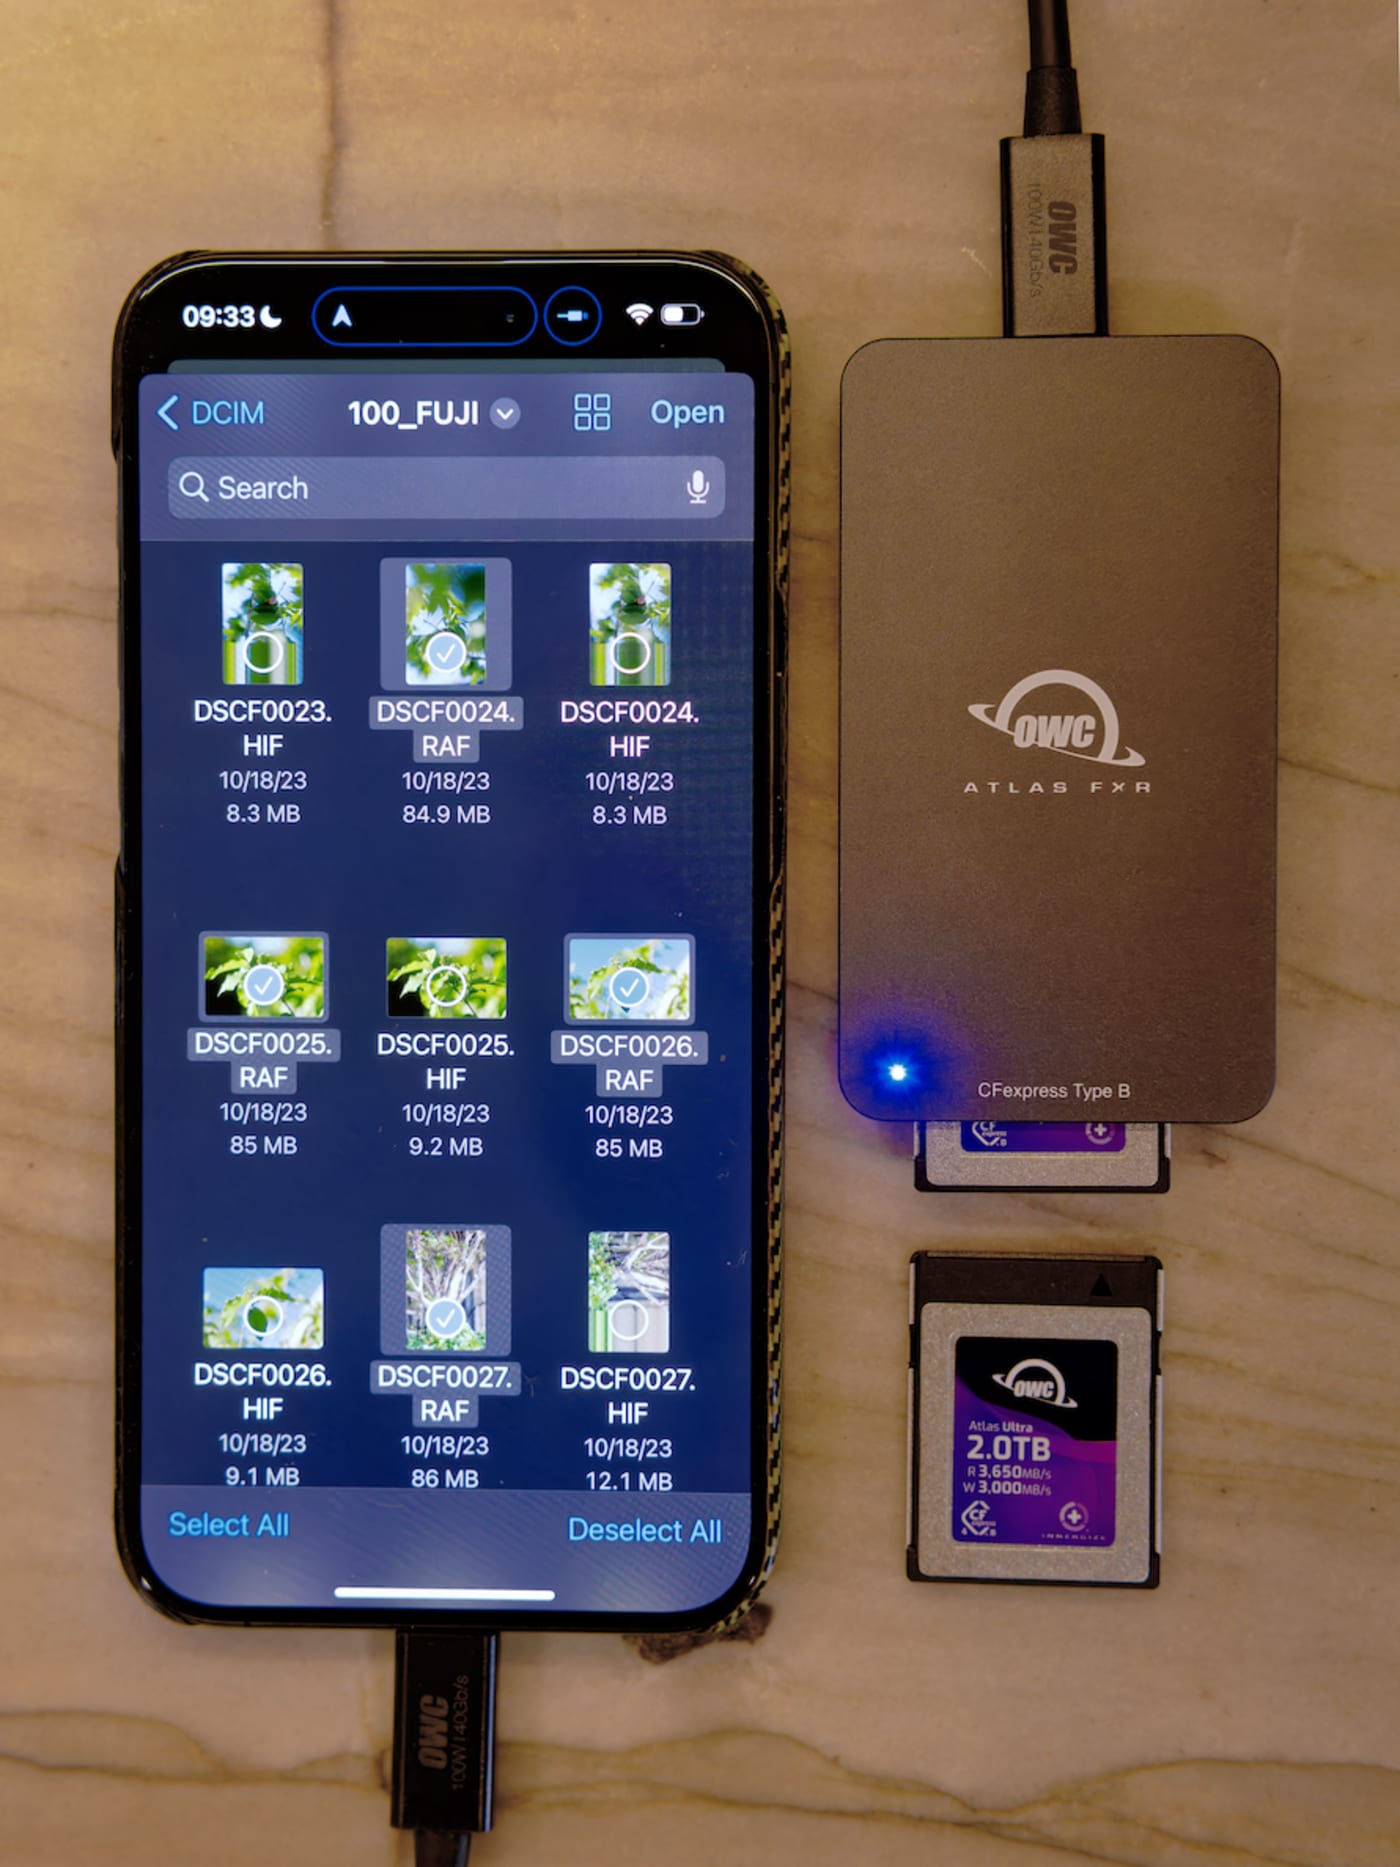
I was able to quickly plug in my Atlas Ultra CFexpress card through my USB-C Atlas FXR reader and edit RAW files from that drive with a few taps. Same goes for plugging in another USB-C SSD you’ve already backed up to like the Envoy Pro FX, Elektron or Envoy Pro Mini. This is something Radiant Photo Mobile takes pride in, noting “We deliver the highest quality results with no restrictions and no walled gardens. We don’t take your photos, videos, or data.”
Another crucial difference between Radiant and other apps is that you don’t have to create an account. I can’t stress how refreshing it is to open an app and not be immediately nagged to sign in.
A Typical Radiant Photo Mobile Workflow
I recently traveled to Tuscaloosa, Alabama, and my alma mater, the University of Alabama for a football game. While I was there I snapped a ton of photos both on my phone and with my trusty Fujifilm X100V. I was also able to bring along my OWC Dual SD Card Reader, pop in my Atlas Pro SD card, and quickly apply edits to some of my favorite RAW files from the X100V in minutes.
The following is an outline of the basic workflow I’ve established within Radiant Photo Mobile.
Batch editing!
Before we get into individual adjustments, if you’re going to edit multiple photos taken in a similar time frame or environment and want to apply any adjustment you make to all of those photos, you’ll want to tap the Batch button before you select a photo. From here, you’ll be able to select all the photos you want to apply the same edits to.
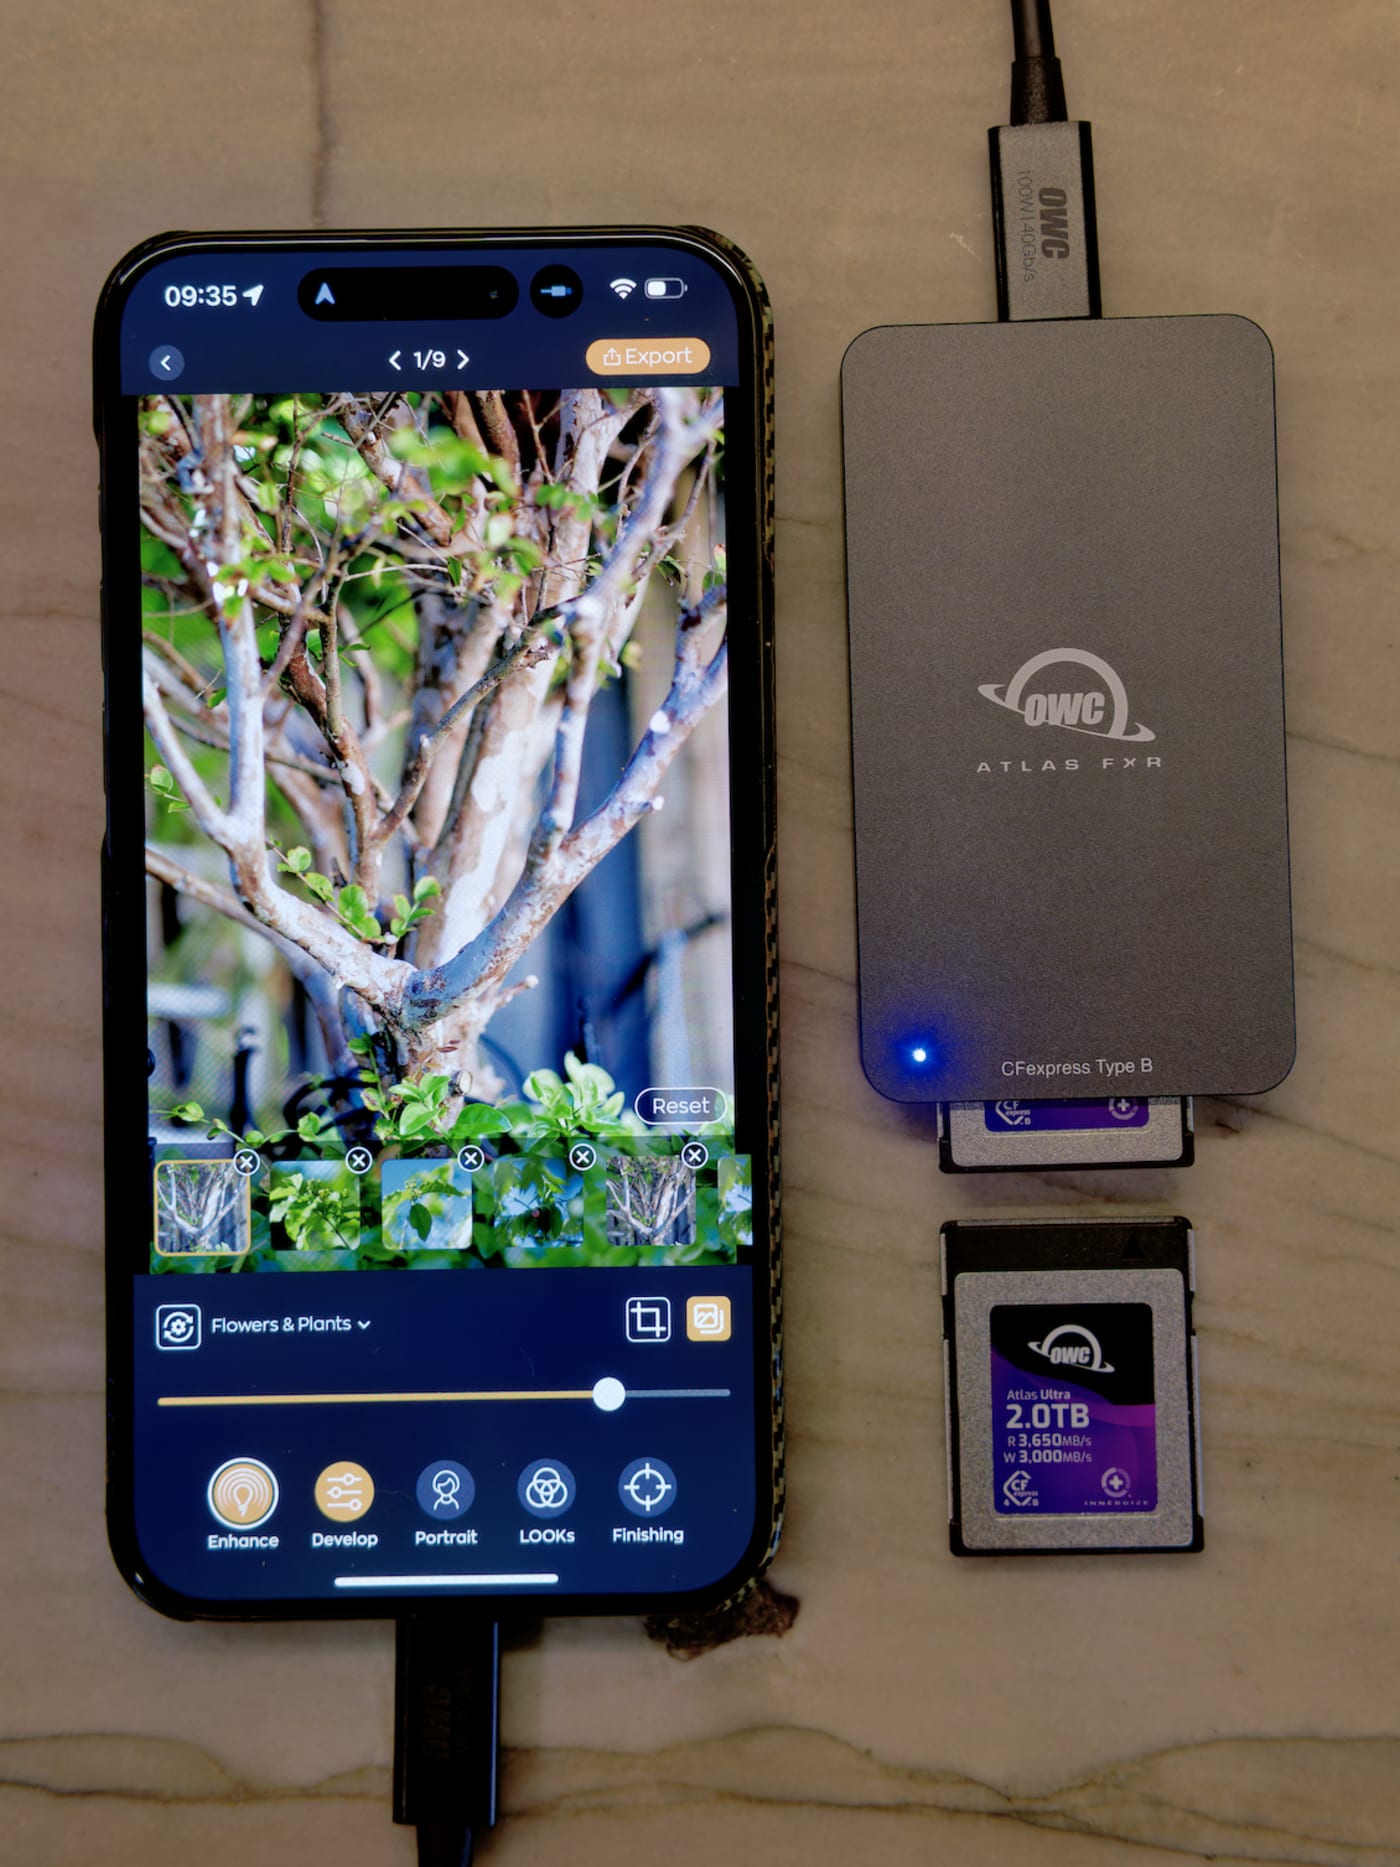
Once you’ve selected your photos, you’ll head into the same interface we describe below. However, you’ll be able to swipe between edit screens for each photo in the batch you created. Notably, in the Enhance tab next to the type of AI enhancement you’re applying to a photo, you’ll see a gear with arrows. By tapping that you’ll be presented to sync the adjustments you’ve made on that photo with either all photos in the batch or only with the photos forward from the photo in the batch. This way, you can make adjustments and tweak your way through the batch rather than working backward.
AI enhancements that are actually good
Once you open a file, Radiant instantly analyzes it with on-device machine learning. It then recommends an AI auto enhancement with a slider in the Enhance tab. And here’s where I was really surprised. I’ve been editing photos for the better part of 20 years now. When I open an app to edit a photo I know exactly what I want to adjust first. Because of this, I’m usually very annoyed when I see auto adjustments because I never agree with them.
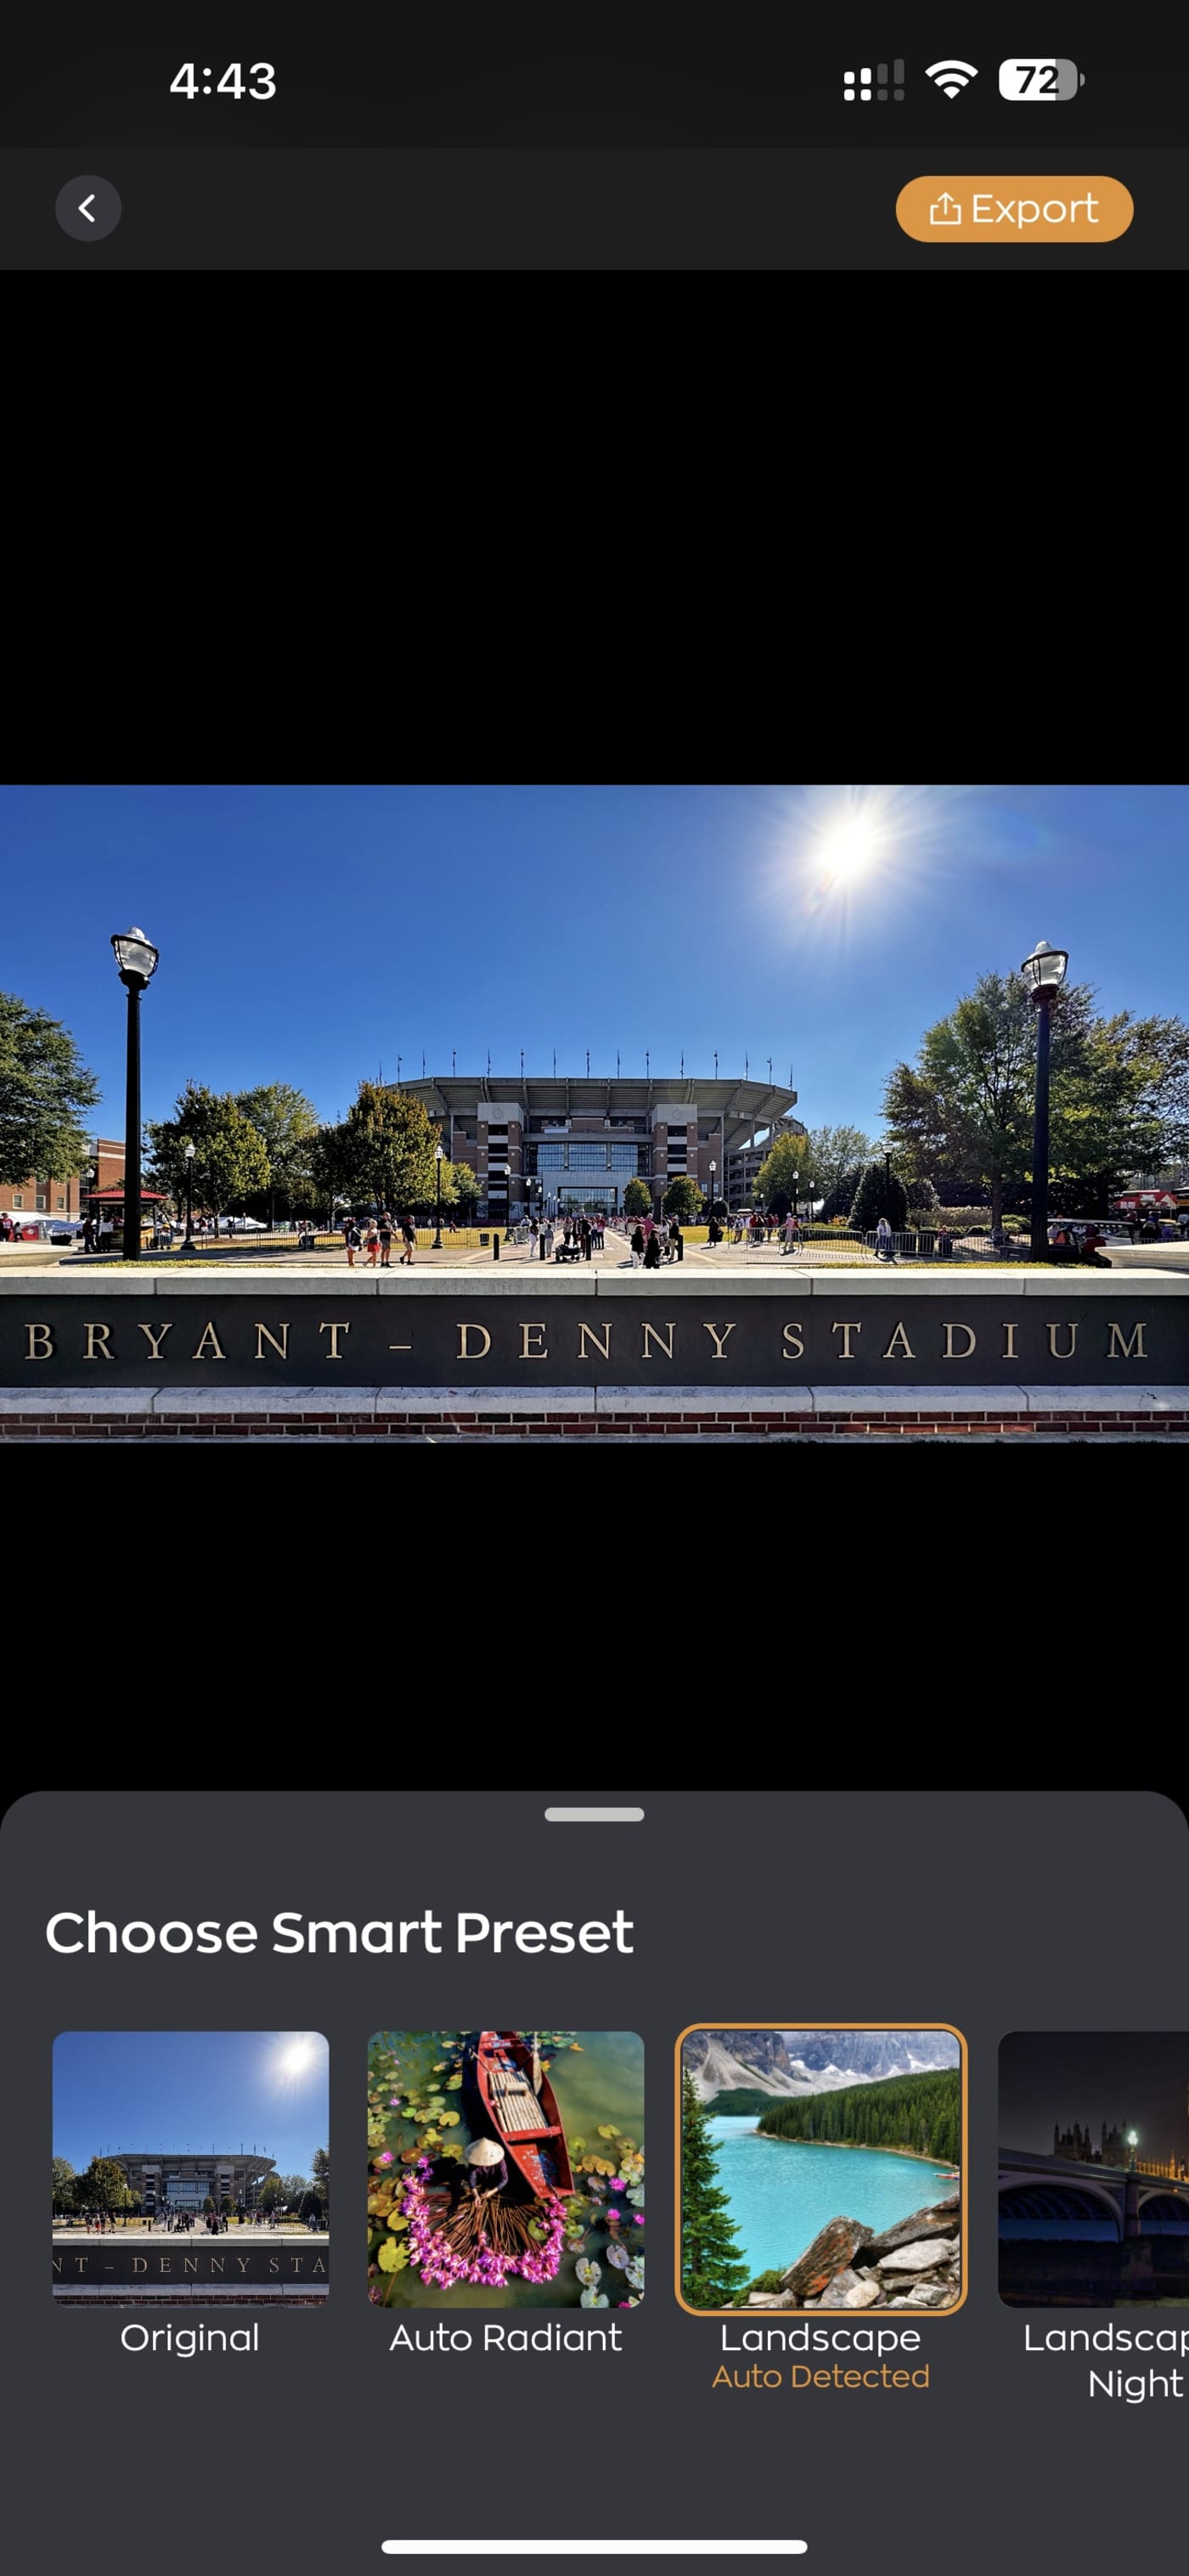
But Radiant’s AI enhancements are actually good. Like, really good. When I see the recommended enhancement pop up, I always play with the slider to adjust the effect, but I hardly ever turn it off. To me, that is impressive. Of course, you can turn the auto enhancements off completely, if you don’t like what the app is giving you. Radiant also has a little dropdown menu that shows you what what AI enhancement has been chosen and if you tap on it, you can choose another category. Sometimes I’ll play around with these, and even “incorrect” choices like choosing Landscape for a nighttime portrait results in interesting looks.
LOOKs
Once you’ve chosen a a mix of AI enhancements, I like to move over to the LOOKs tab. LOOKs are what Radiant is calling its filters. But again, the difference is that these are really good filters. Under this tab, you’ll find emulations of color and black and white film stocks, vintage, retro, and other filters.
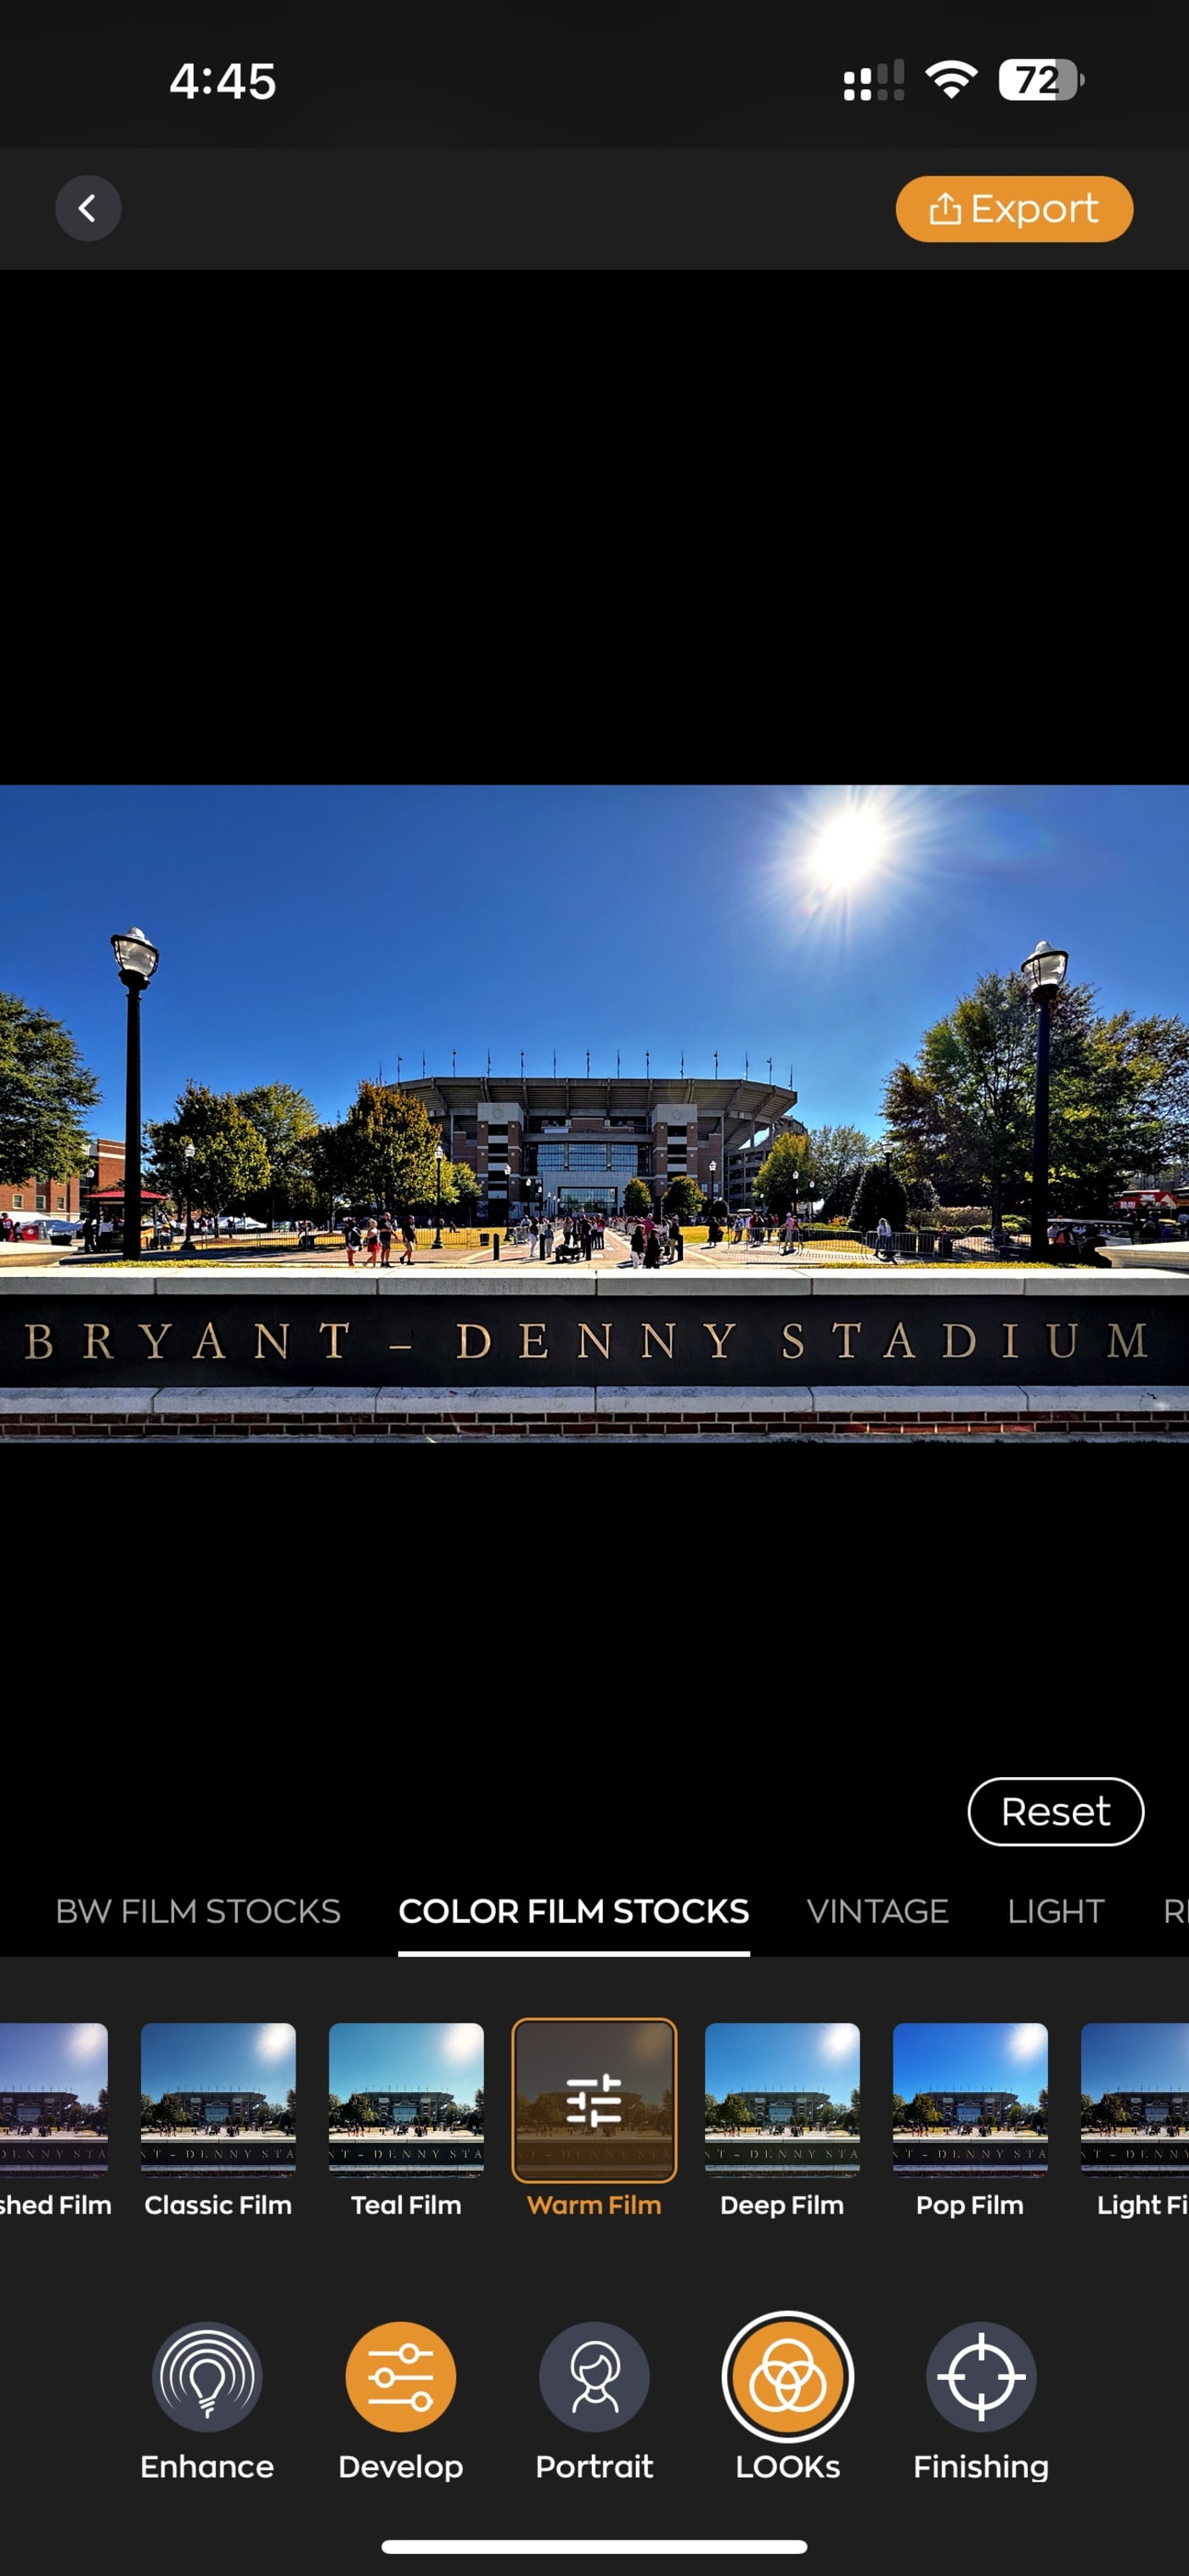
My favorite is Warm Film. But no matter which you choose, you have full over not only the strength of the LOOK you apply, but also on the saturation and contrast within the LOOK. It’s just another example of how much control Radiant provides to give you the ability to dial in a photo exactly how you want it while saving you time in getting there.
Powerful tools in the Develop tab
With my LOOK applied, I then move on to the Develop tab, which has a suite of powerful controls that adjust the look of your photo. Think of the Develop tab as like having a custom filter creator at your fingertps. My favorite tools in this section are found under Tone and Color. Under Tone, you’ll find a Light Diffusion slider that is incredible at reducing the harshness of lighting either on a subject or across a scene. Once you’ve used this one, you won’t want to edit Portraits without it.
Another great Develop tool is Super Contrast. This is under Tone as well and is not your normal contrast slider. Instead, it acts as a sort of global contrast tool, working within the colors, shadows, and highlights of an image to make things pop. The closest thing I can compare it to is the Clarity slider in Lightroom. But Radiant’s Super Contrast is better. Richer.
Another incredible set of Develop tools is found under Color, my favorite of which is Color Contrast. This is actually my favorite slider in Radiant Photo Mobile, period. It has a way of drastically changing the mood of a photo and I think it’s one of the reasons this app can come so close to film-like edits. The first time I used this slider I literally said “What?” out loud.
Portrait enhancements
If you’re editing a portrait, you can then move on to the Portrait tab which has a large selection of enhancements that adjust lighting and apply instant touch-ups to your photos to smooth skin tones and hide things like blemishes and other imperfections. I’m never big on touching up skin in photos, but I will say the lighting adjustments Radiant has achieved with these Portrait enhancements are fantastic.
My favorite tool of the bunch is the Natural Catchlight enhancement, which not only provides a bit of lift light under the eyes of your subject, but also brightens the pupils and makes the catchlight reflection in the eyes themselves more noticeable.
Export
From there, you’re ready to Export. When you tap the Export button, you’ll have the option of exporting to your Camera Roll, saving the edited image to your Files, or sharing it to another app. It would be nice in future versions to see Radiant add options for resolution, file type, and image quality here.
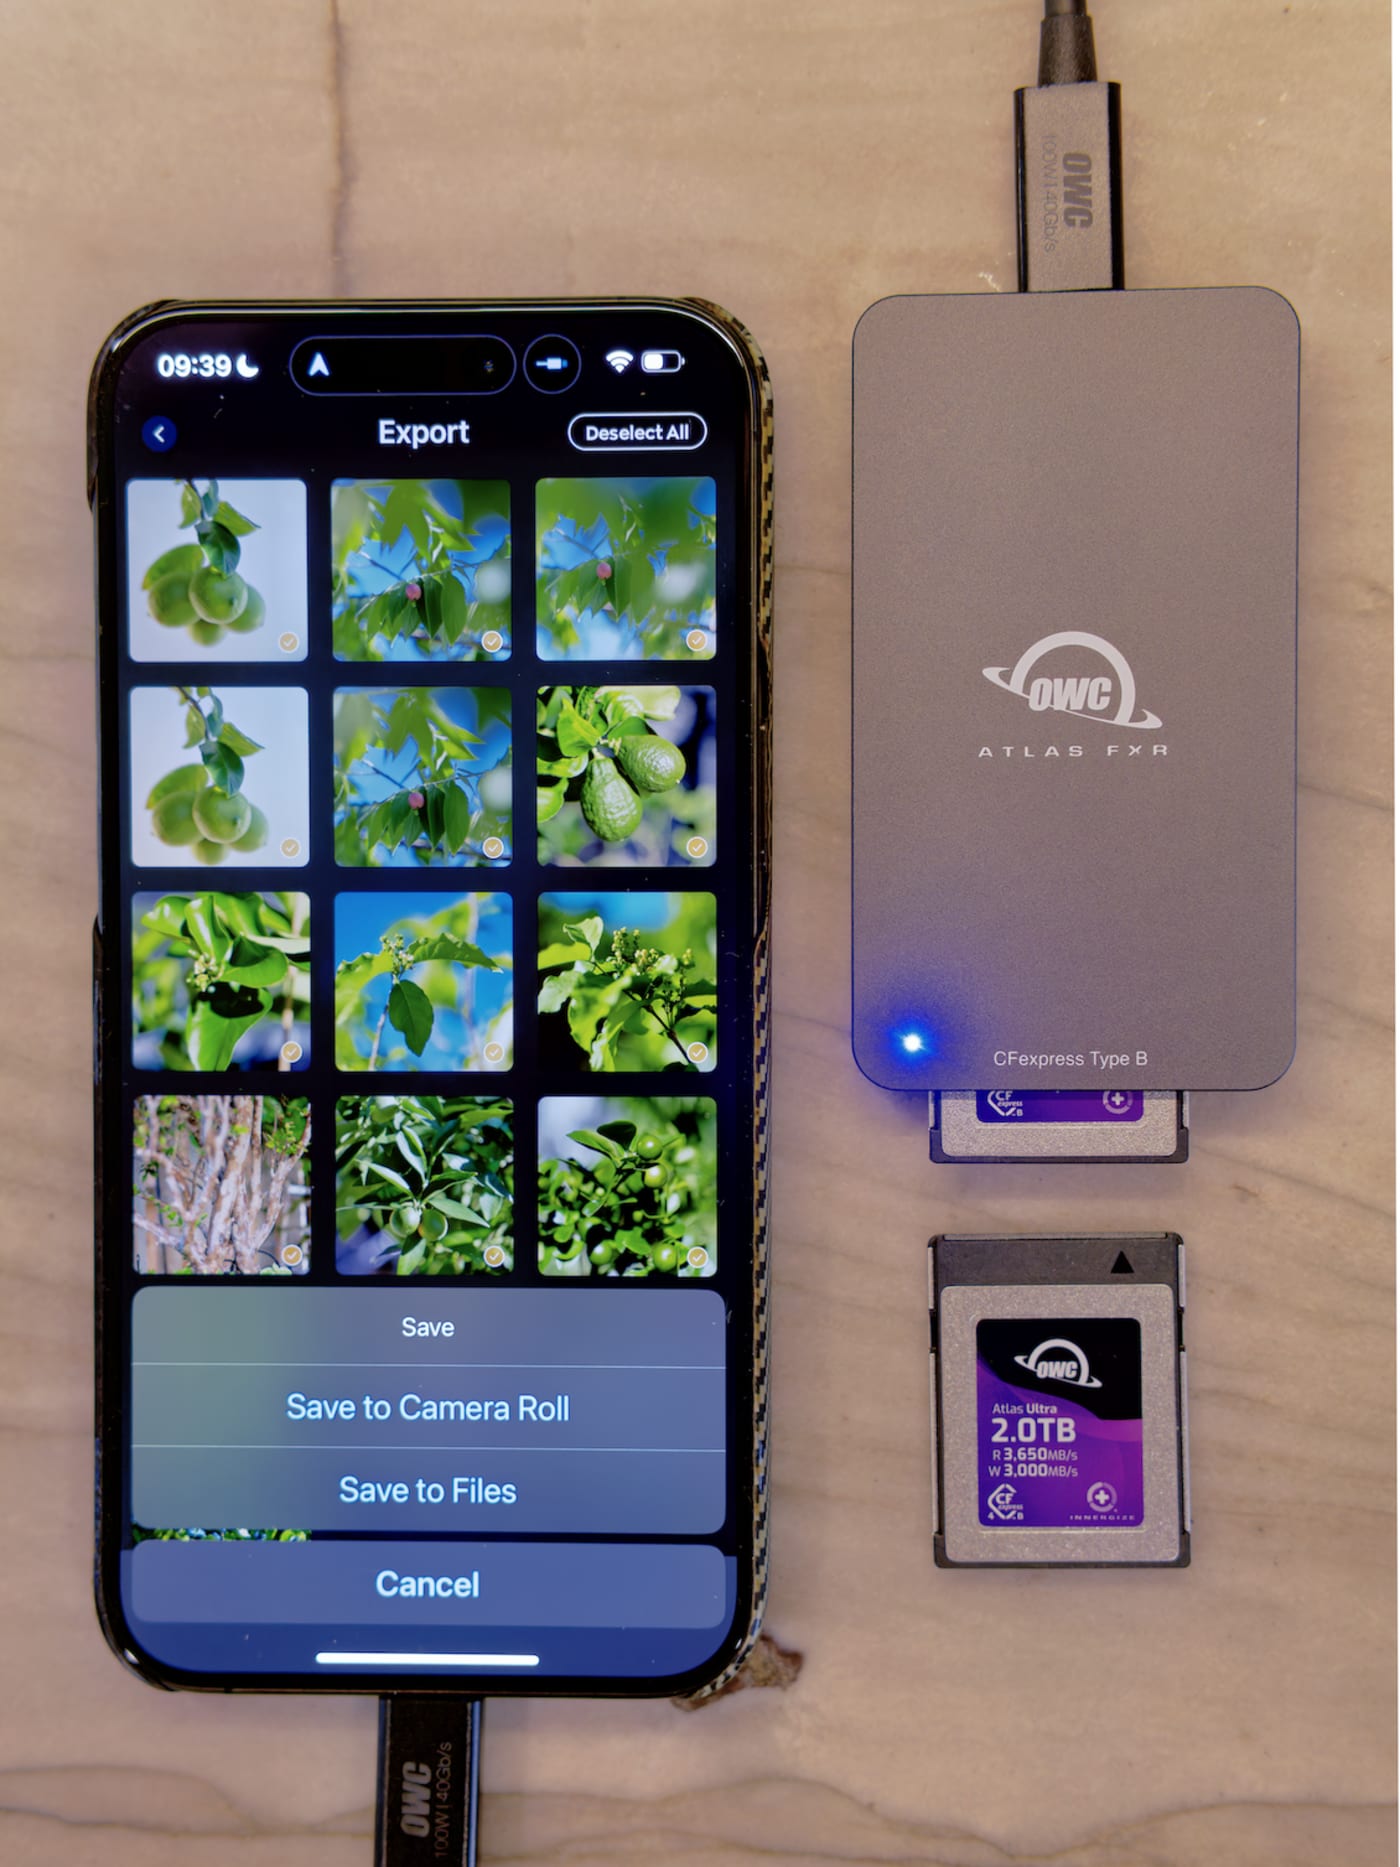
In my experience, the photos are all original resolution files with file sizes between roughly 2 and 3 MB each. Files export in just seconds and Radiant says they are “print-ready” files.
Pricing
Radiant Photo Mobile is free to download from the iOS App Store and Google Play Store. The free version gives you full access to all AI Auto enhancements and the ability to adjust their strength. It even includes batch editing for up to five photos.
Meanwhile, the PRO version is for those who want the ultimate control over the photos, allowing for complete manual editing and tweaking of results and including the powerful Develop tools I mentioned above. The PRO version can be purchased for $19.99 per year, $3.99 per month, or a one-time lifetime access charge of $49.99.
Conclusion
Radiant Photo Mobile is not just a worthy companion to the Radiant Photo desktop app, it’s a must-have for any photographer already using Radiant on desktop. The AI enhancements Radiant has built into Radiant Photo Mobile are the most reliable, easiest to use, and easiest to customize I’ve yet encountered. And the fact that you can edit directly from your SD or CFexpress card on your phone and have a beautiful finished photo in just minutes is incredibly powerful.